Tuesday, December 01, 2009

How to protect your equipment against EMP?

Electromagnetic pulse (EMP) occurs with a nuclear explosion in the atmosphere.

Simply said it destroys electronics. After an EMP there will be no working radio, television, telephone, power-grid, car or cash-machine.
Banks will stop working and even a millionaire will not be able to buy any food.
People who need medicine or care will have to try without.

Although vacuum tubes are far more resistant to EMP than solid state devices, other components in vacuum tube circuitry can be damaged by EMP.
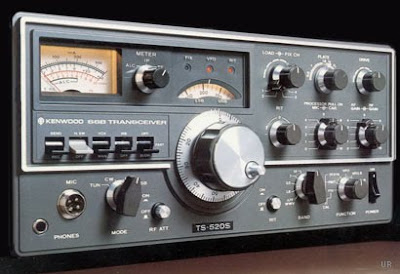


Protecting against an EMP can be done with the help of a cage of Faraday.
Put your vacuum tube transceiver in a metal box. Make sure the equipment does not touch the metal cage/box. Don't ground the cage/box.

To operate your now state of the art station after nuclear disaster strikes you need power. Remember the power-grid is pre nuclear history and you need your own generator and battery to get up on the air.

More info here:

http://www.peakprosperity.com/wsidblog/87871/building-your-own-faraday-cage

Saturday, October 31, 2009

Maxtor 6L250R0 234 GB (30515 Cyl 255 H 63 Sec)

I have this Hard disk that I need for an old MS-DOS system. 

No support site, no sticker on the drive. 

 Finally after a long search. Google saves the day and points me to a backup of a logfile deep in the sediments of the interwebs. I found an old logfile.txt and from it I could extract the needed data. 

 Maxtor 6L250R0 234 GB IDE Name: Maxtor 6L250R0 

 Kind of drive:  Physical drive 250GB Capacity, UDMA/133, 7200RPM, 16MB Cache, 3.5in Hard Drive, 8.5 ms average seek time, 4.17 ms average latency, IDE interface. 

 Geometry: 30515 Cylinders * 255 Heads * 63 Sectors 

 LBA sectors: 490,223,475 (234 GB) 

 Kind of access: LBA mode

Monday, July 06, 2009

Citrix ICA client on Ubuntu 9.04


1 Go to: http://www.citrix.com to download and install the linux ICA client/Citrix Receiver.
(http://www.citrix.com/English/ss/downloads/details.asp?downloadId=3323&productId=186&c1=sot2755&c2=ost1349860)
Run setupwfc.

2 Install usertrust certificate.
(Needed by the ICA client for encryption of the ICA stream.)
Copy http://www.usertrust.com/cacerts/UTN-USERFirst-Hardware.crt to ./usr/lib/ICAClient/keystore/cacerts/ or ./home/#username#/ICAClient/keystore/cacerts/
Run in terminal:
wget http://www.usertrust.com/cacerts/UTN-USERFirst-Hardware.crt -O ./usr/lib/ICAClient/keystore/cacerts/

3 Workaround for Program neighbourhood manager bug.
Run in terminal:
sudo apt-get install libmotif3
cd /usr/lib
sudo ln -s libXm.so.3 libXm.so.4


4 Reboot
Run in terminal:
reboot

5 Configure the ICA client/Citrix Receiver.
Start Citrix Receiver and go to Connection > Propperties > Connection and choose 128 bit Encryption Level.

Monday, April 20, 2009

(K)ubuntu 8.04 on the HP Mini 2133 (FU338EA)


Finally the screen problems are solved.

Here is how I finally got the HP Mini 2133 (FU338EA) working correctly with kubuntu.

First install kubuntu-8.04.2-desktop-i386.iso

Then install the VIA video driver.
Browse to http://linux.via.com.tw/support/downloadFiles.action
select "Ubuntu 8.04 LTS" and download the stable version.
Extract the files.
Open a terminal and go inside the directory you just created and run ./vinstall
Now download a new xorg.conf file from: https://wiki.ubuntu.com/LaptopTestingTeam/HP2133?action=AttachFile&do=get&target=xorg.conf
Rename your existing xorg.conf file to xorg.conf.old and replace the original one with the one you just downloaded.
To restart the X server press 'CTRL + ALT + Backspace'
If all is well relax and enjoy. Otherwise:

Edit xorg.conf.
change the PanelID value in "Device" section of xorg.conf. Correct PanelID value for 1024x600 is 17 (Add line 'option "PanelID" "17"')

Wednesday, April 15, 2009

How to update the BIOS of an Asus EEE pc


Download the latest driver from:
https://www.asus.com/uk/supportonly/Eee%20PC%201000Linux/HelpDesk_BIOS/

Rename the file to 1000.ROM or 1005P.ROM or any number that matches your Eee PC and copy that to a FAT 32 USB stick.
Start up with the USB stick inserted and hold both ALT and F2 keys pressed during startup of the Eee PC and the BIOS update will run. The screen will show the update process.